We all want to live in an environment with clean water, but hard water residue can often make that difficult to achieve. The best way to ensure a steady stream of fresh, clean drinking water is to install a reliable home water filter. If you already have one in your home, the next step is to do proper maintenance and replace the filter on time.
Nothing contributes more to appliance longevity than regular maintenance and filter changes. However, changing a water filter can sometimes be challenging and time-consuming. Not anymore.
Knowing how to change your home’s water filter can not only ensure a continuous supply of healthy drinking water but also save you money by minimizing repair and service fees down the line. In this article, we will walk you through several effortless ways how to change your home’s water filter for optimal performance with minimal energy consumption expense. Let’s get started.
Why Do We Need to Change the Water Filter?
Water filters are used to remove chemical substances and small particles from water. As they are used over time, the substances accumulate in the filters, making them unsuitable for the work they’re supposed to be used for.

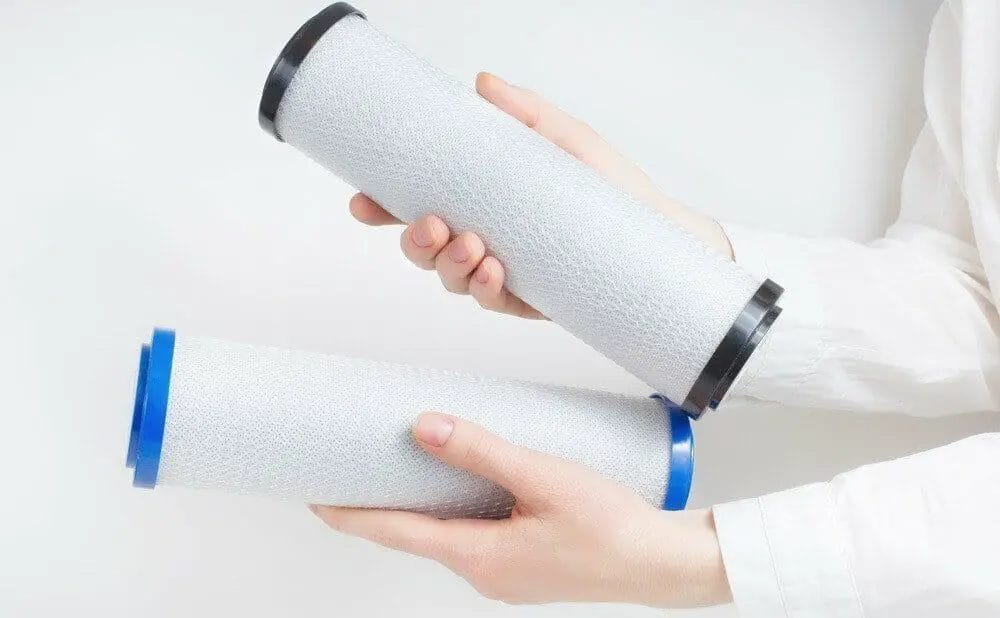
It is thus necessary to change water filters at certain times to enable them to function correctly. Filters contain carbon, which is used to remove impurities from water. The quantity of carbon in the filter is important, as the longer water is uncovered to carbon, the more contaminants can be eliminated.
Aged water filters can be dangerous to water because impurities would have built up in the filters over the years, and the continued use of such filters water can be hazardous to the water. It is advisable to change water filters when you notice the water coming out is no longer clean and pure.
How to Change Water Filter?
A water filter provides you with clean and drinkable water. There will come a time when you’ll need to replace it. You don’t need to worry; changing the water filter is easy to follow the below steps:
Step-1: Prepare Yourself
Homeowners must have the right tools and knowledge to shut off water to their houses. It can save you time and money and prevent epic failures. Before attempting any plumbing repairs or maintenance, it is important to be prepared. The first step is to print out this checklist and check off each item as you go through them.
One of the items on the checklist is to locate where your water meter is at the curb and verify that you have a water shut-off key or wrench. This will allow you to turn off the water in case of an emergency quickly or if you need to make repairs. It is a great opportunity to practice turning your water off if you haven’t done it before, so you can verify your valve can be shut off and reopened successfully. If, for some reason, you cannot turn it off, don’t hesitate to call your local water utility for help.
Step-2: Unplug the System and Depressurize It
The first step in turning off the water and depressurizing the system is to locate the main water line. This is typically located near the water meter or where it branches out into other lines. It is important to understand which way the water is flowing before attempting to shut it off. Once you have identified the main line, you can then proceed with shutting off the water.
It is also important to fill up a sink or bucket before turning off your water. This will provide you with fresh water for rinsing or washing up if needed. Additionally, Fichtner recommends that you turn off all appliances that use hot water, such as dishwashers and washing machines, before shutting off the main line. This will help prevent any backflow from occurring when depressurizing the system.
Step-3: Water Filter Bypass
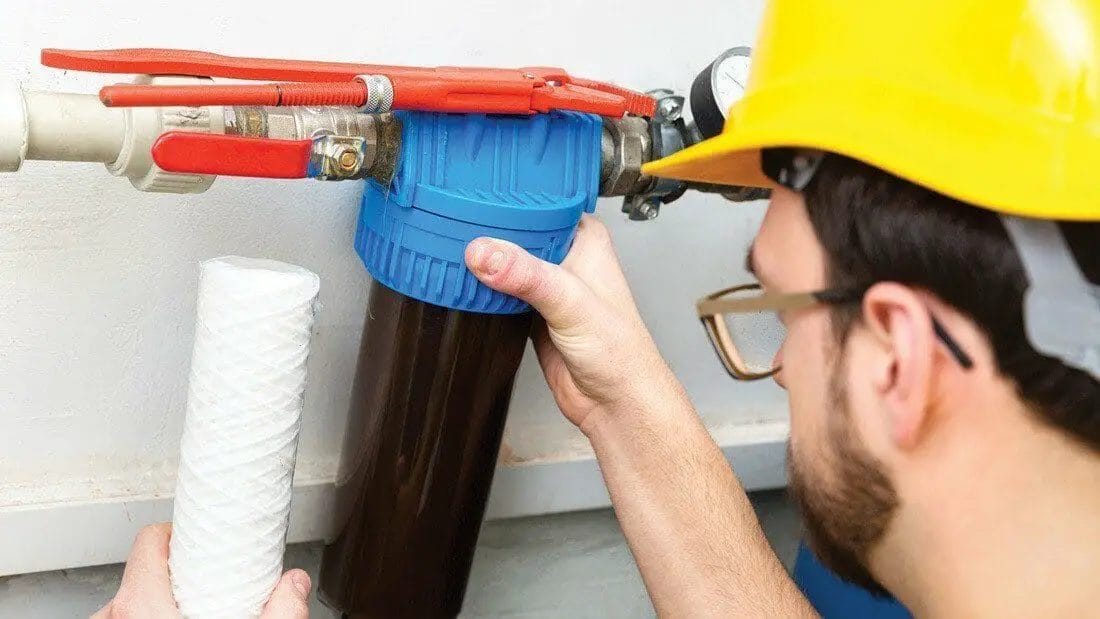
A whole-house water filter bypass is important in maintaining your home’s plumbing system. This setup allows you to isolate the water filter from the rest of the plumbing so that you can replace or repair it without having to shut off the entire system.
It is usually a simple 90-degree handle that is used for this purpose. When the handle is flush with the pipe, water is allowed to flow through; when it is turned 90 degrees, it shuts off. Some systems use flower stem handles; righty tighty means closed, and lefty loosey means open.
The first step in setting up a whole house water filter bypass is to turn off the valve connected to your water filter. This will ensure that no water flows through while you are working on replacing or repairing it.
Once this valve has been shut off, you can proceed with whatever maintenance needs to be done on your filter without worrying about disrupting other parts of your plumbing system. It’s important to remember that once all repairs have been completed, you should always turn this valve back on before turning any other valves back on.
Step-4: Remove the Big Blue Filter Canister
Opening the big blue filter canister can be a tricky task for many people. The most common issue is that they have over-tightened the filter or the system is still pressurized, making it difficult to open. To make things easier, better whole-house filter systems have a red button on top that releases the water pressure in the line and makes it much easier to open the housing there is a red button on top of better whole-house filter systems to release the water pressure in the line and make opening housing much easier.
Once you press this button, you’ll hear the pressure release, so you won’t have to wrestle with the wrench for a long time. Some filter systems even have a built-in bypass which allows you to bypass the filter altogether if needed.
Step-5: Inspect the old filter housing
Congratulations, you have completed the fifth and final step of replacing your water filter. Now it is time to inspect the old filter and clean out the filter housing. Start by pouring the water from the filter housing into a bucket below. This will allow you to look for any large sediment pieces that may indicate contamination from a broken water line.
There should be no problem with your water’s smell, but if it does not, your water source or utility lines may not be chlorinated. If this is the case, it is important to investigate further and take steps to ensure that your drinking water is safe.
Once all the sediment has been removed from the filter housing, use a damp cloth or sponge to wipe down any remaining residue on the inside walls. Make sure that all surfaces are clean before putting in a new filter. After cleaning out the filter housing, you can install your new filter and enjoy fresh drinking water.
How will you understand that your reverse osmosis membrane requires changing?
It is safe for you to know how long your reverse osmosis lasts. This is to be aware of when to change the filters. The first and always reliable way to know is when you notice that your water now comes with a certain taste. Water should usually be tasteless, so when the water from your filter comes in with taste, you know it needs to be changed.
The filters of your reverse osmosis are to be changed at intervals. You don’t have to wait for it to be overused before changing. If you do not change your filters, there might be a blockage from the accumulation of debris or dangerous substances, due to use for a long time. And this will prevent the free flow of water in the filter.
Water filters do not necessarily have a lifespan, but there can be a guideline in the manual as to when to change your filter. There are also other significant changes you’ll notice in your reverse osmosis membrane, that will give you a clue that they need to be changed:
- If you see that it takes a long time for water to flow out of the system, then it needs change. You have been using the system for a long time, so you will be aware of how long it takes to fill a specific jar with water.
- You need to change your filter when there is the water pressure in your membrane. You can easily change the filter or the whole system.
How to change a reverse osmosis membrane
The first thing to note in changing a reverse osmosis membrane is to close all water supply in and out of the system. But, first, open the nearest eater supply to drain off any water and release any pressure that may be left in the system.

Then detach the tube from the membrane casing. Remove the old membrane from the casing. Be sure to have rags or clothes around to clean any water that might come out of the system. Remove the cap on the membrane casing with pliers.
Insert the new reverse osmosis membrane into the O-ring. This is easier done by putting grease around the O-ring and the seal. Then, turn on the water supply in the system. Wait for about 2 hours, then turn on an opening, letting all the water out. This is done to flush the membrane. Do this for two or three times more. Then taste the water; if it feels good, you’re good to go. But if not, flush the membrane again.
Frequently Asked Questions [FAQs]
1. How often do I have to change my water filter?
The best is to clean or change your water filter every two months. But this also depends on the filter’s capacity, the rate at which it is used, and the maintenance measures put in place.
2. Can my water filter expire?
Water filters do not have a lifespan, as it were. They only need to be maintained and cleaned at intervals. It is only the filters in them that have to be changed regularly.
3. Why is it necessary to filter my water?
Water is one of man’s significant needs that is taken directly into the body. It is thus necessary to get the best out of it. Not all water that comes from treatment plants is entirely free of contaminants and small particles. Water filters are essential to eliminate any unwanted particles that may come with water. They also get rid of lead from water.
4. What happens if I don’t change my water filter?
A dirty water filter can bring out water with bad odor and taste. It can also get blocked and may affect the performance of the water filter system.
5. Is it necessary to change the filter in my refrigerator?
It is advised to change the refrigerator filter every three to six months. It doesn’t affect your water, but it helps the taste and odor or the water filtered.
Conclusion
Changing your water filter is important to maintaining a healthy and clean water supply. It is necessary to change the filter every two months or as the manufacturer recommends. You don’t always need to call a professional; you can change your water filter by following the abovementioned steps. Those steps are easy and so effortless. So, why spend money when you can change the water filter yourself?
Sarah J. Gregory
352 Hershell Hollow Road
Anaheim, CA 92805


